Appearance
Rapiwa Integration with n8n
Automate WhatsApp Messaging with n8n and Rapiwa
Integrate Rapiwa with n8n to automate WhatsApp messaging at scale. This guide explains how to configure your Rapiwa account, retrieve your Device Key, and connect it to n8n for seamless message automation.
Overview
Rapiwa is a reliable API platform that provides unlimited WhatsApp messaging capabilities.
Using n8n, a visual workflow automation tool, you can easily send and manage WhatsApp messages without writing complex code.
Prerequisites
Before you begin, make sure you have:
A Rapiwa Account
- Sign up at rapiwa.com.
- You’ll need to generate a Device Key to authenticate your API requests.
An n8n Instance
- Access to n8n (cloud or self-hosted).
- Basic understanding of building workflows using HTTP Request nodes.
Getting Started with Rapiwa
Step 1: Create a Rapiwa Account
- Visit app.rapiwa.com/login.
- Enter your WhatsApp number to register.
- You’ll receive an OTP on WhatsApp — enter it to verify your account.
Step 2: Add a Device
- From your Rapiwa dashboard, go to the Devices page.
- Click Add Device to connect your WhatsApp number.
Once created, your device will appear on the Devices list.
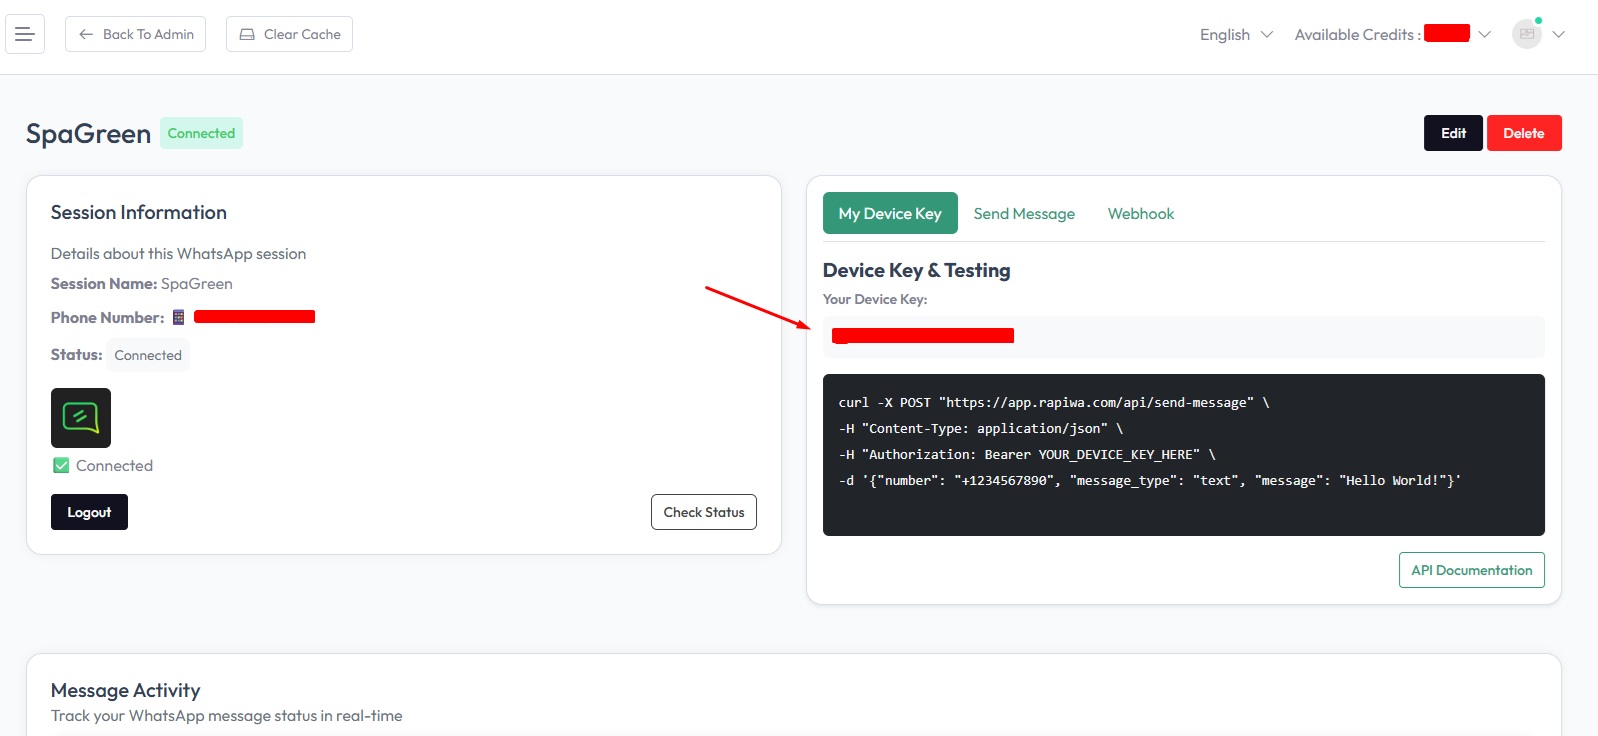
Step 3: Retrieve Your Device Key
- After adding your device, click Manage next to it.
- Scan the QR code to connect your WhatsApp account to Rapiwa.
- Once connected, your Device Key will be displayed.
- You can also view connection status, send test messages, and manage your WhatsApp instance from this screen.
Connect Rapiwa to n8n
Now that you have Rapiwa set up, let’s connect it to n8n to automate your WhatsApp workflows.
1. Set up your n8n workflow
- Log in to your n8n account.
- Click + New Workflow to create a new workflow.
- Add a trigger node of your choice.
Popular triggers include Google Forms, Jotform, ClickUp, or a Schedule trigger. - Connect and configure your trigger according to your use case.
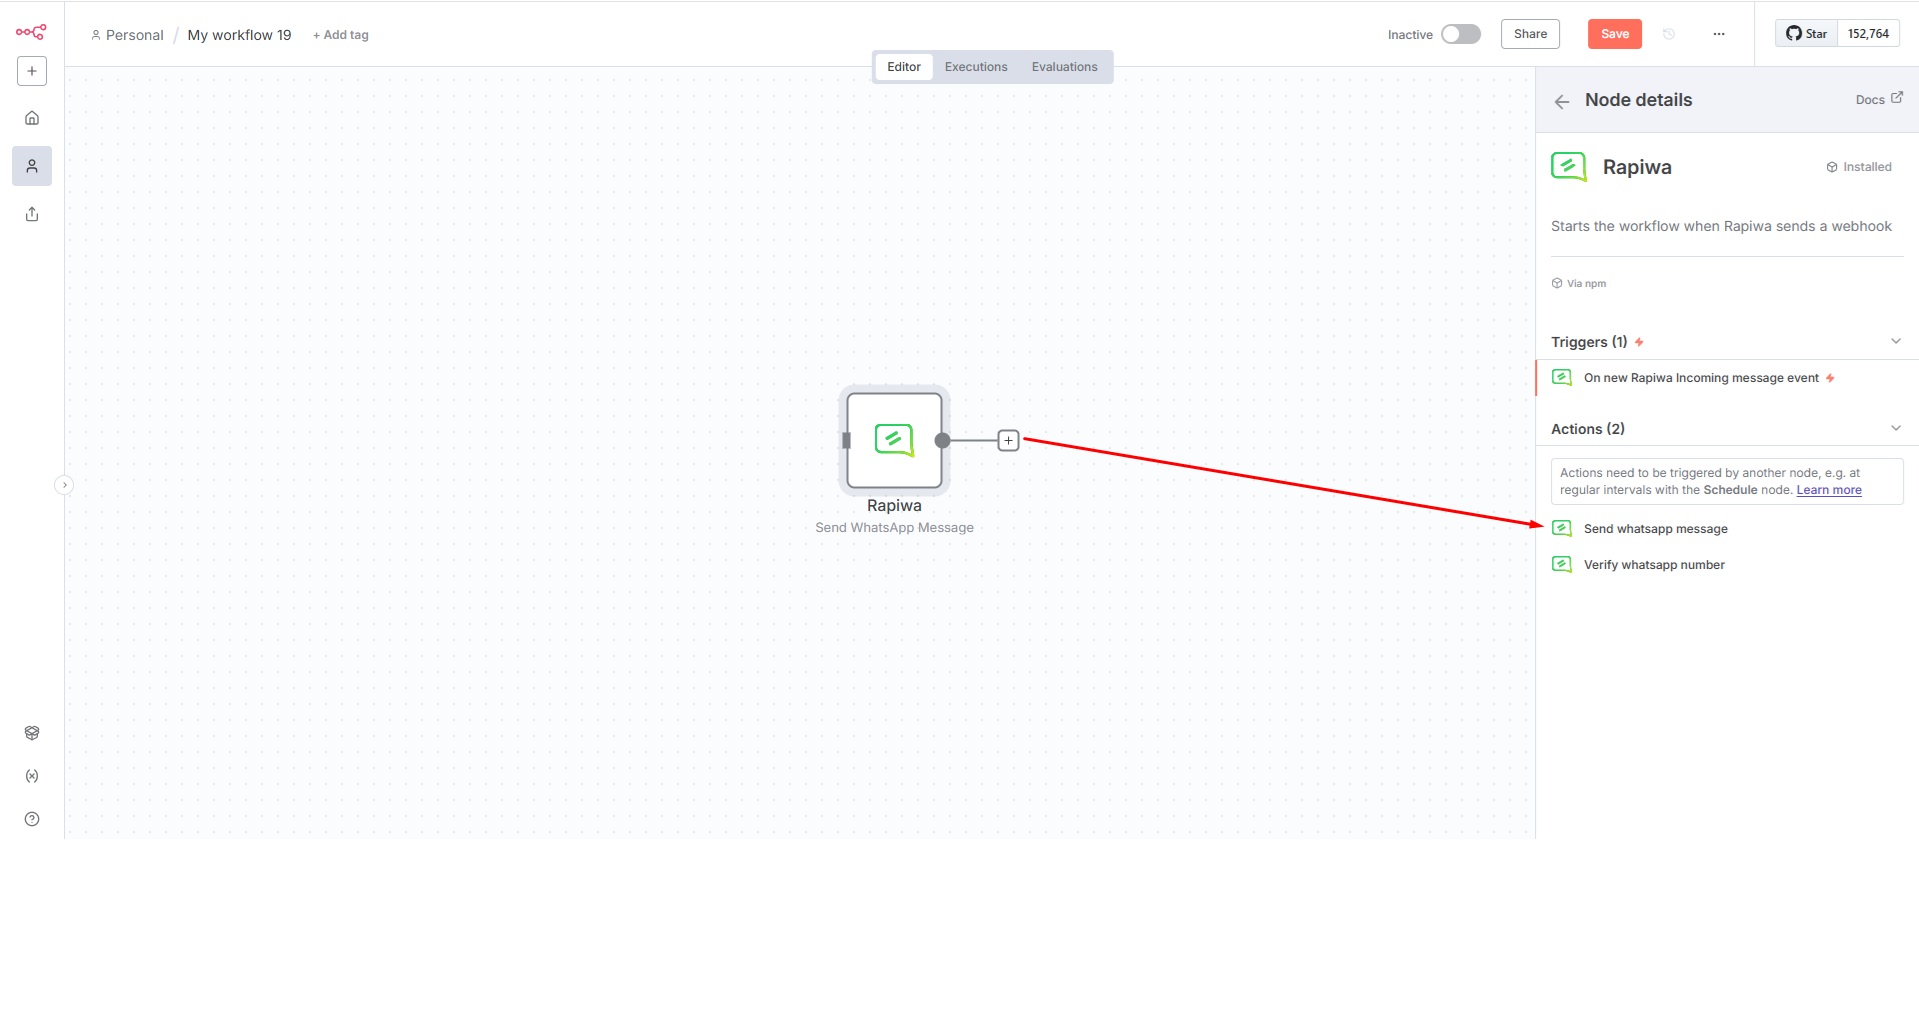
Rapiwa Trigger Node
The Rapiwa trigger node enables your workflow to respond automatically to incoming WhatsApp messages. This setup is optional but recommended for reactive communication flows.
Add Rapiwa Trigger Node
- Click the + button in your workflow canvas to add a new node.
- Search for “Rapiwa” in the node library search bar.
- Select the node displaying the official Rapiwa logo.
- From the available trigger options, choose On new Incoming message event.
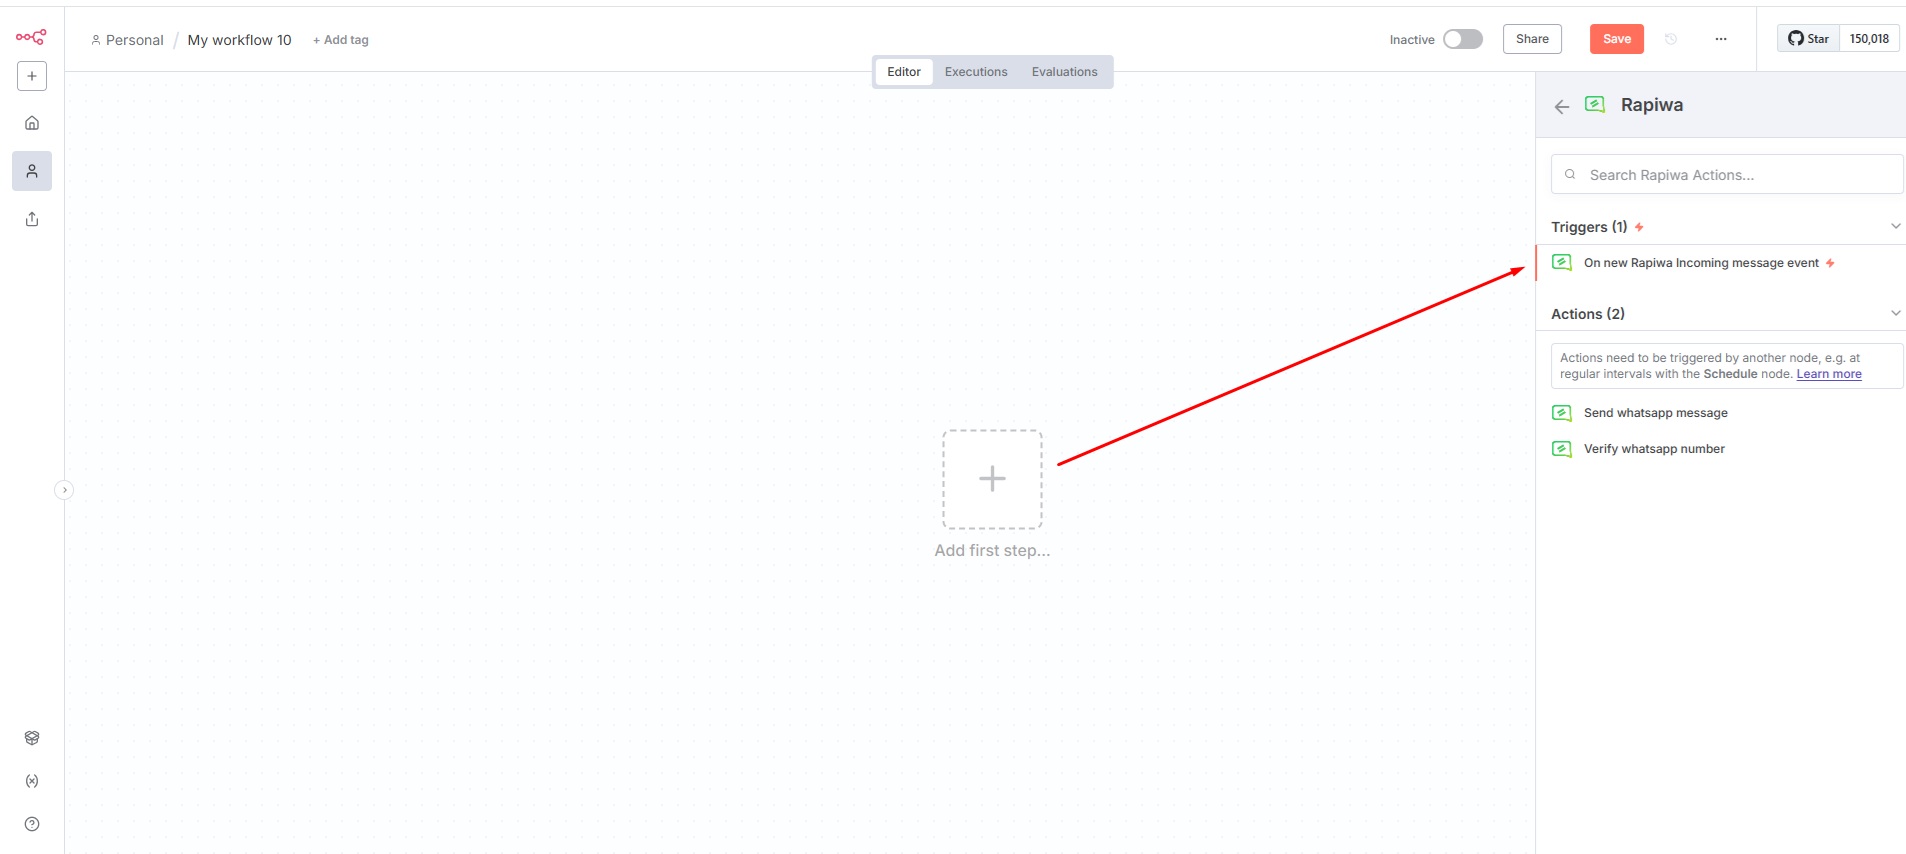
Once configured, the trigger node will automatically listen for incoming messages and initiate your workflow whenever a new message is received.
Configure Authentication Credentials
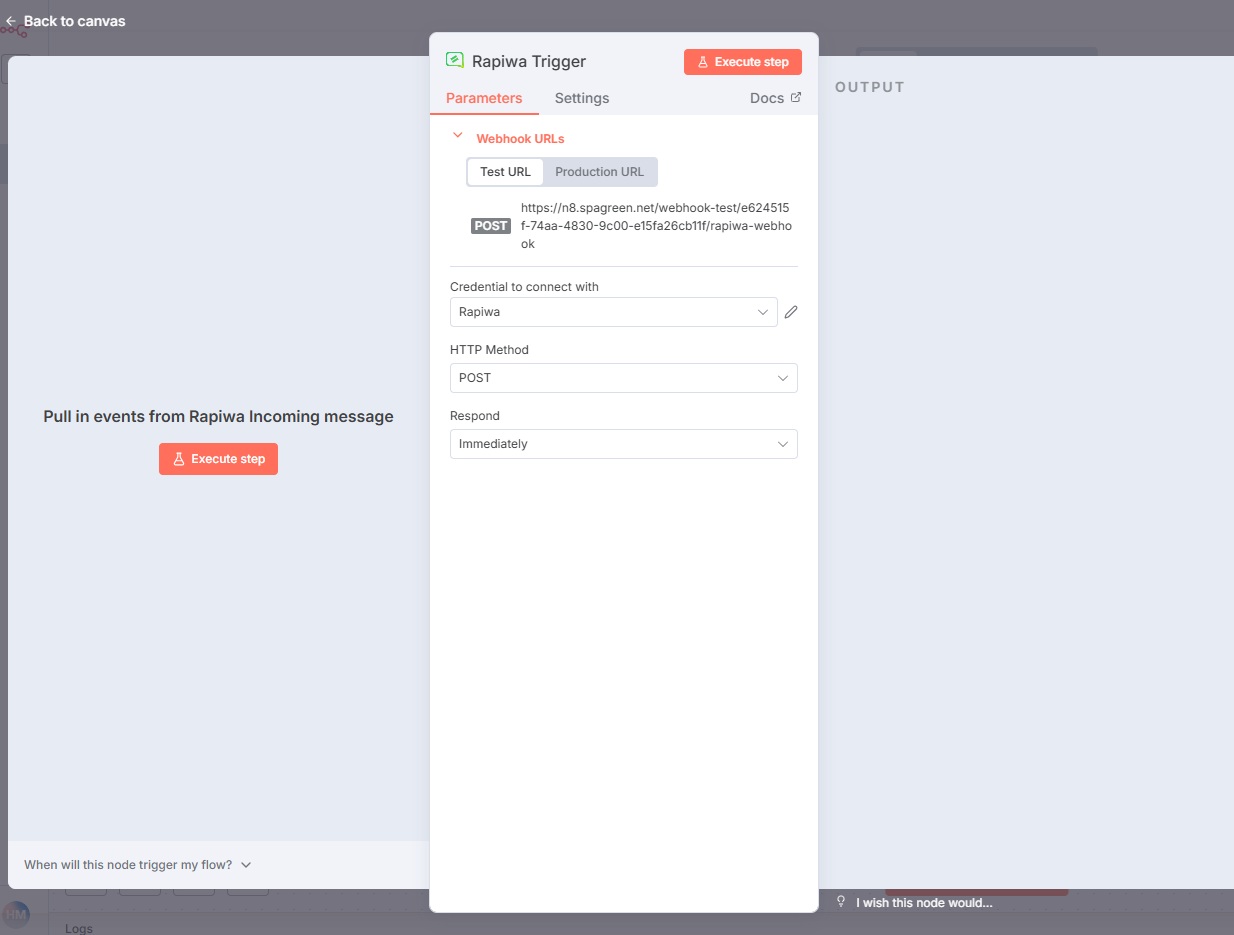
Webhook URL Configuration:
- In the Rapiwa Trigger node parameters, locate the Webhook URLs section at the top.
- Select Production URL and copy the generated URL.
- Store this URL securely — you’ll need it for the credential setup.
Credential Creation:
- In the Credential to connect with dropdown, click + Create new credential.
- Select Rapiwa Trigger API as your connection method.
- Enter your Rapiwa Device Key in the API Key field.
- Paste the Production URL you copied earlier into the Production URL field.
- Click Save to securely store your credentials.
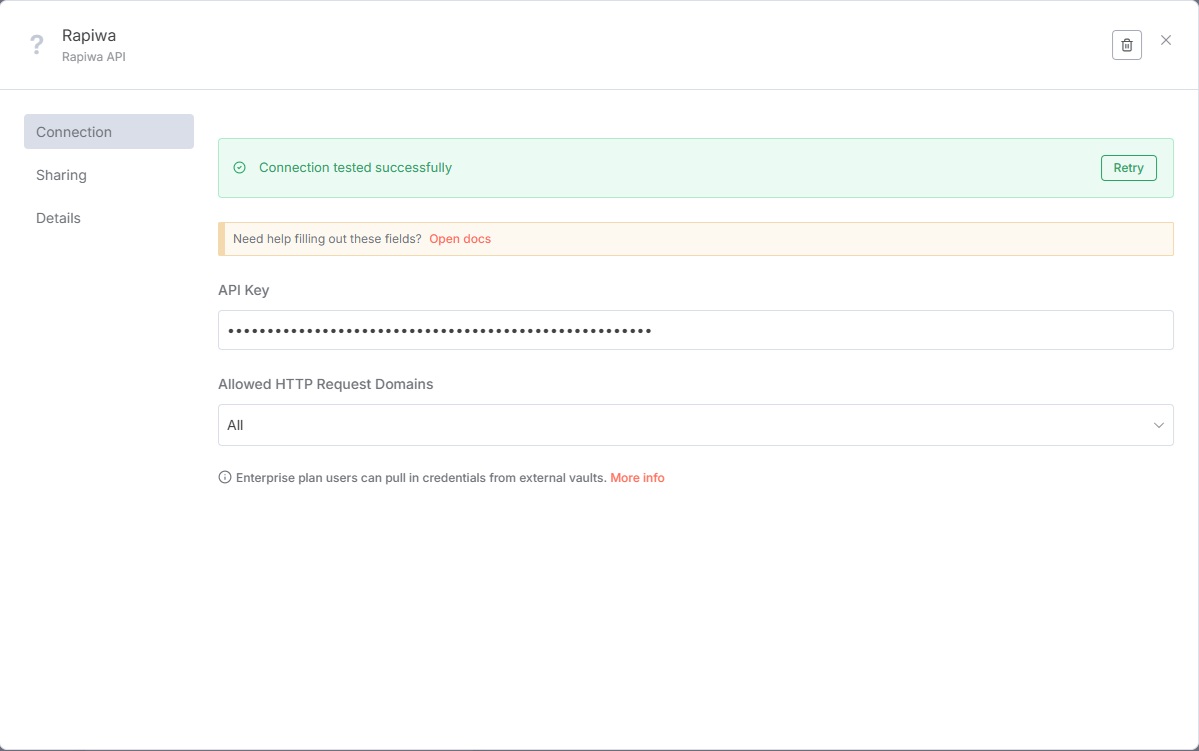
⚠️ Never share your Device Key publicly.
Test and Activate Workflow
Response Configuration:
- Immediately: Responds as soon as the trigger fires.
- When Last Node Finishes: Waits for the entire workflow to complete before responding.
Testing:
- Click Execute Step on the Rapiwa node to run a test.
- Verify the connection is working by checking for a success confirmation.
- Review any error messages if the test fails and adjust your configuration accordingly.
Once activated, your workflow will automatically process incoming messages according to your configured logic.
2. Add the Rapiwa Node
- Click the + button to add a new node.
- Search for “Rapiwa” in the node library.
- Select the node with the official Rapiwa logo.
- After selecting the Rapiwa node, choose Send message via Rapiwa from the available actions menu.
3. Configure Rapiwa Credentials
Credential Setup:
- In the Rapiwa node settings, find the Credential to connect with dropdown.
- Select + Create new credential.
- Enter your Rapiwa Device Key.
- Click Save to store your credential securely.
4. Configure Your Message
In the Rapiwa node configuration:
- Resource:
Send Message - Operation:
Send message via Rapiwa
Required Fields:
| Field | Type | Description |
|---|---|---|
| Number | string | Recipient’s phone number (with country code). |
| Message | string | The message text to send. You can use variables from previous nodes. |
Example:
Header
Content-Type: application/json
Authorization: Bearer Your_Device_Key
Body
{
  "number": "88017XXXXXXXX",
  "message_type": "text",
  "message": "Hello from n8n and Rapiwa!"
}
Click Show Optional Parameters if you wish to include additional fields like media or buttons (available in Rapiwa API).
5. Test and activate your workflow
- Click Test Step on the Rapiwa node to verify it’s working correctly.
- If the test is successful, you’ll see a confirmation message in the execution log.
- Click Done to return to your workflow.
- Click Save to save your workflow.
- Toggle the Active switch in the top-right corner to activate your automation.
Example use cases
| Use Case | Description |
|---|---|
| Customer Onboarding | Send a welcome message when a new customer signs up. |
| Order Notifications | Notify customers when their order status changes. |
| Appointment Reminders | Automatically send reminders before scheduled appointments. |
| Lead Follow-up | Send personalized messages to new leads from your form submissions. |
| Support Ticket Updates | Notify customers when their support ticket status changes. |
Workflow Diagram
Sample Rapiwa n8n Workflow:
%%{init: {'theme': 'default'}}%%
flowchart LR
    A[Trigger Node] --> B[Data Transformation]
    B --> C[Rapiwa Node]
    C --> D{Message Sent?}
    D -->|Yes| E[Success Path]
    D -->|No| F[Error Handling]
    E --> G[Additional Actions]
    F --> H[Retry Logic]
Troubleshooting
| Issue | Possible Cause | Solution |
|---|---|---|
| Message not sent | Invalid device key or phone number | Double-check credentials and format (include country code). |
| Media not delivered | File too large or unsupported format | Verify file size and type via Rapiwa API docs. |
| No response in test | Workflow inactive or misconfigured node | Ensure workflow is active and API endpoint is correct. |
Need help?
Our support team is ready to assist you:
📧 Email Support: support@rapiwa.com
💬 Live Chat: Click the Help & Support button on the left sidebar of your Rapiwa dashboard